从 Zip/打印中编程 Gambas
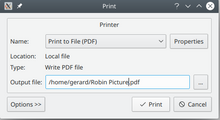
在练习打印时,“打印到文件”将节省纸张。您可以使用喜欢的 PDF 阅读器(如 Okular)打开生成的 PDF(便携式文档格式)文件,并在屏幕上查看您将在纸上得到的内容。
这是关于打印的最简单的演示。在您的程序中,您需要一个“打印机”。我们使用过按钮和表格视图等对象。您可以看到它们。但是,打印机是不可见的。有一个打印机类,就像有一个按钮类一样。您将打印机拖放到表单上,就像拖放按钮或任何其他对象一样。在表单上,它看起来像一台打印机,但在程序运行时,它不可见。它实际上只是一块代码,内置于 Gambas 中,并执行打印机应该做的事情,即打印并照顾页面大小和方向等。Printer 是一个聪明的对象。
首先,您告诉您的 Printer 对象配置,然后您告诉它打印。(“打印机,打印!”,或者正如我们在 Gambas 中写的那样,prn1.print)。当您告诉它打印时,它将发出 Draw 事件。在 draw 事件中,您放置要在页面上打印的内容。您使用另一个类(Paint 类)的所有功能来执行此操作。Paint 类可以将内容放置在页面上以进行打印,但它还有其他用途,例如在表单上的 DrawingArea 或 ScrollArea 中绘制。好了,我们开始了!
此小型表单包含一个 Printer 对象和一个名为 bPlainPrint 的按钮。
Public SimpleText As String

Public Sub Form_Open()

  SimpleText = "Countries of the World<br><br>Papua New Guinea<br><br>Papua New Guinea is a country that is north of Australia. It has much green rainforest. It has beautiful blue seas. Its capital, located along its southeastern coast, is Port Moresby.<br><br>This is plain text in Linux Libertine 12 point.<br><br>John Smith, editor"

End

Public Sub pr1_Draw()
  Paint.Font = Font["Linux Libertine,12"]
  Paint.DrawRichText(SimpleText, 960, 960, Paint.Width - 2 * 960)
End

Public Sub bPrintPlain_Click()
  If pr1.Configure() Then Return 'if user clicks Cancel, don't continue
  pr1.Print
End
当表单打开时,一些文本被放入名为 SimpleText 的变量中以供打印。
单击按钮时,会告诉打印机 pr1 自行配置。如果用户单击 取消 按钮,这将返回 True 值,因此我们不应再做任何事情。否则,亲爱的友好打印机对象,请打印。
打印机对象 pr1 向我们发送 Draw 事件。它在说,“我想画点东西!请告诉我要在页面上画什么!”。我们通过说:
Paint.Font = Font["Linux Libertine,12"]
Paint.DrawRichText(SimpleText, 960, 960, Paint.Width - 2 * 960)
Paint.Font 是描述字体的属性。它是一个包含部分的属性。我们使用 Font[something] 来组装这些部分。Something 是一个字符串。例如,Font["Bitstream Vera Serif,Bold,24"] 表示“组装一个字体,它是 Bitstream Vera Serif,粗体,24 点”。这被放在 Paint 东西的 Font 属性中。实际上,Paint 东西只是一组技能。它不是你可以看到的任何东西。它是一个不可见的类。小心不要在该字符串中放置空格,除非它是字体名称的一部分。 Gambas 帮助 会警告您这一点。在逗号两侧也不要放置空格!
Paint.DrawRichText(something) 是 paint 的技能之一。它是一种它知道如何做的方法。它至少需要方括号中的三件事。它可以接受更多。这里我们有四个“参数”或“方括号中的东西”。第一项:要打印的内容。第二项:开始打印的横向距离。第三项:开始打印的纵向距离。960 将提供一英寸的边距。每英寸 96 点是典型的默认打印机分辨率。数字是“十分之一点”。(我希望我理解正确。)第四项:我的打印要多宽?答案:Paint 允许的全部宽度,减去左侧和右侧一英寸。每英寸是 960。减去两个。
<br> 表示“换行”,这将转到下一行。<br><br> 表示转到新行,然后再次转到新行。它给了我们一个空行。
富文本理解 <br>。它还理解在文本中植入的许多其他符号。有一些符号可以使其使用“标题 1”样式打印,“标题 2”等等。但是,您不能更改这些样式的外观。它们是内置的,就是这样。您还可以在文本中的任何位置更改字体、打印大小和颜色。这些代码使打印以某种方式呈现。实际上,它本身就是一种语言:超文本标记语言,或 HTML。例如,要打开 粗体,请放入此标签:<b>。当您想关闭 粗体 时,请放入此标签:</b>。
不要使用 PlainText,而是让它打印:
FancyText = "<h3>世界各国</h3><Small>巴布亚新几内亚</Small><hr><br>巴布亚新几内亚是一个位于<font color = #780373><b>澳大利亚</b>以北的国家。</font><font color = black>它拥有丰富的</font><font color = green>绿色雨林</font><font color = black>。它拥有美丽的<font color = blue>蓝色海洋</font><font color = black>。它的首都位于东南海岸,是<Font Face=Times New Roman, Color=#FF0000>莫尔斯比港</font>。<br><br>这是用<font face = Arial>HTML<br></font><p align = right><font face = Times New Roman, Size=+1><b>约翰·史密斯</b></font>,<i>编辑</i></p>"
顺便说一句,如果将该文本保存在扩展名为 .html 的文本文件中,它将在 Web 浏览器(如 FireFox)中打开并显示。您可以试试。
结果将是
我使用了标题 3(<h3> … </h3>),因为标题 1 太大了。
文本中有很多标签,使它看起来像那样。Gambas 允许使用这些标签。它只是从完整的 HTML 中选择一小部分。在您的文字处理器中保存一个 HTML 文档,在像 Kate 这样的文本编辑器中打开它,并惊叹不已。
| <h1>,<h2>,<h3>,<h4>,<h5>,<h6> → 标题 | <sup> → 上标 |
| <b> → 粗体字体 | <small> → 小字体 |
| <i> → 斜体 | <p> → 段落 |
| <s> → 删除线 | <br> → 换行 |
| <u> → 下划线 | <a> → 链接 |
| <sub> → 下标 | <font> → 字体 |
| <Font Color=#B22222> ... </Font> | <p align=right> ... </p> |
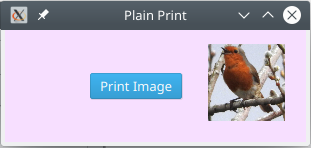
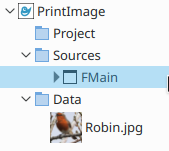
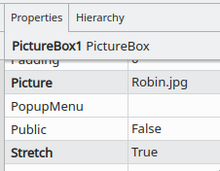
将图片文件拖放到 Data 文件夹中。将 PictureBox 的 Picture 属性设置为它。
打印机名为 pr1。
Public Pic As Picture

Public Sub pr1_Draw()
  Paint.DrawPicture(Pic, 960, 960, 3000, 3000)
End

Public Sub bPrint_Click()
  If pr1.Configure() Then Return 'if user clicks Cancel, don't continue
  Pic = PictureBox1.Picture
  pr1.Print
End
图片被缩放为 3000 x 3000。当我打印到文件时,分辨率为每英寸 96 点(96 dpi)。图片在距顶部和左侧边距 1 英寸的位置打印,并被缩放以适合大约 3 英寸 x 3 英寸(3000x3000)。
在此程序中,40 个姓名被发明并放入名为 Z[] 的数组中。如果您是认真的,可以使用户输入姓名列表,或从姓名文件加载,或从数据库中获取。
姓名将垂直打印在页面上。需要留出边距,这里设置为一英寸(打印到 PDF 时为 960 个点)。它存储在变量(窗体的私有属性)SideMargin 中。左右边距相同。上边距为 TopMargin。
打印姓名时,在打印下一个姓名之前要向下移动多少距离?LineSpacing 设置为 280。这大约相当于 0.3 英寸。(960 是 1 英寸)。
计划如下:打印一个姓名。无论姓名有多长,都向前移动一点。这是水平线的起点。线长为页面宽度减去右边距。绘制这条线。向下移动一行间距。打印下一个姓名。绘制它的线。向下移动。打印一个姓名。绘制它的线,以此类推。
然后绘制垂直线以制作方框。从最长名称宽度右侧一点开始。移动 330 个点,绘制一条垂直线,再移动 330 个点,绘制下一条线,以此类推。不要超过水平线的终点。最后,为了使右侧边缘整齐,绘制最后一条垂直线。打印机称为 Prn。按钮为 bPrint。
Private z As New String[]
Private LineSpacing As Integer = 280
Private TopMargin As Integer = 960
Private SideMargin As Integer = 960

Public Sub Prn_Draw()

  Dim s As String
  Dim i As Integer
  Dim NameWidth, HowFarDown, MaxNameWidth, MaxDistanceDown As Float
  Dim MaxWidth As Float = Paint.Width - 2 * SideMargin

  Paint.Font = Font["Linux Libertine,12"]
  Paint.Color(Color.Black)
  Paint.MoveTo(SideMargin, TopMargin) 'start here
  Paint.LineTo(Paint.Width - SideMargin, TopMargin) 'draw to here
  Paint.Stroke 'paint the top line
  For i = 0 To z.Max
    s = z[i]
    NameWidth = Paint.TextExtents(s).Width + 180 'gap at the end about 1/5 inch
    MaxNameWidth = Max(MaxNameWidth, NameWidth) 'remember the width of the longest name
    HowFarDown = TopMargin + (LineSpacing * (i + 1))
    Paint.DrawText(s, SideMargin, HowFarDown)
    Paint.MoveTo(SideMargin + NameWidth, HowFarDown) 'starting position
    Paint.LineTo(Paint.Width - SideMargin, HowFarDown) 'finishing position
    Paint.Stroke 'draw the line
  Next
  MaxDistanceDown = TopMargin + z.Count * LineSpacing 'vertical lines go down to here
  For i = SideMargin + MaxNameWidth + 100 To Paint.Width - SideMargin Step 330 'step across the page every 1/3 inch
    Paint.MoveTo(i, TopMargin)
    Paint.LineTo(i, MaxDistanceDown)
    Paint.Stroke
  Next
  Paint.MoveTo(Paint.Width - SideMargin, TopMargin)
  Paint.LineTo(Paint.Width - SideMargin, MaxDistanceDown)
  Paint.Stroke 'final line on right

End

Public Sub GetNames()

  Dim FN As String[] = ["Oliver", "Jack", "Harry", "Jacob", "Charlie", "Thomas", "George", "Oscar", "James", "William", "Amelia", "Olivia", "Isla", "Emily", "Poppy", "Ava", "Isabella", "Jessica", "Lily", "Sophie"]
  Dim SN As String[] = ["Smith", "Jones", "Williams", "Brown", "Wilson", "Taylor", "Moreton", "White", "Martin", "Anderson", "Johnson", "Walsh", "Miller", "Davis", "Burns", "Murphy", "Lee", "Roberts", "Singh", "Evans"]

  FN.Shuffle
  SN.Shuffle
  Dim i, n As Integer
  For i = 1 To 40
    z.Add(FN[n] & " " & SN[n])
    n += 1
    If n > FN.Max Then
      FN.Shuffle
      SN.Shuffle
      n = 0
    Endif
  Next

End

Public Sub bPrint_Click()

  Prn.OutputFile = User.Home &/ "Names.pdf" 'I'm printing to a pdf file
  If Prn.Configure() Then Return
  GetNames
  Prn.Print()

End
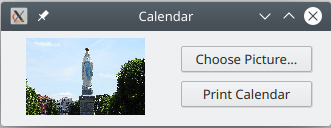
该窗体包含一个名为 PictureBox1 的图片框、一个名为 Prn 的打印机以及两个名为 bPicture 和 bPrint 的按钮。
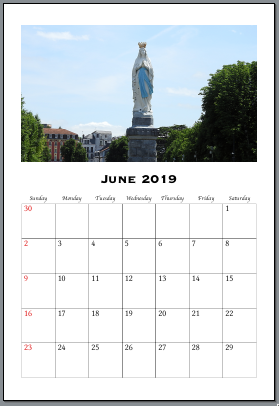
该程序打印当前月份的日历。当您查看要打印的页面时,您会看到需要在不同位置打印的“内容”。有三个需要重复的内容:方框、每个方框左上角的数字以及一周中各天的名称。
我为 PictureBox1 设置了一个默认图片(程序运行后立即显示)。首先,我将照片拖到 Data 文件夹中。然后,我将图片框的 Picture 属性设置为该照片。
如果您最初没有图片,用户需要在点击 打印 按钮之前点击 选择图片... 按钮。图片存储在一个名为 Pic 的属性中。如果它为空,打印将不会继续。
Public Pic As Picture

Public Sub LoadPicture()

  Dim Path As String

  Dialog.Title = "Please Select a picture"
  Dialog.Filter = ["*.jpg", "*.png", "Image Files", "*", "All files"]
  Dialog.Path = User.Home
  If Dialog.OpenFile() Then Return
  Pic = Picture.Load(Dialog.Path)
  PictureBox1.Picture = Pic

End

Public Sub bPicture_Click()
  LoadPicture
  FMain.SetFocus
End

Public Sub bPrint_Click()

  Pic = PictureBox1.Picture 'This line can be deleted if you don't give your PictureBox a default picture.
  If IsNull(Pic) Then
    Message("Please select a photo first.")
  Else
    Prn.OutputFile = User.Home &/ "Calendar.pdf"
    If Prn.Configure() Then Return
    Prn.Print
  Endif

End

Public Sub Prn_Draw()

  Dim LeftMargin As Float = 480 'half inch
  Dim TopMargin As Float = 1200 'inch and a bit
  Dim row, col, DayNum, CellNum As Integer
  Dim s As String
  Dim ThisMonth As Integer = Month(Date(Now)) 'the month number of the date part of the NOW function; 1 to 12
  Dim ThisYear As Integer = Year(Date(Now)) 'current year
  Dim FirstOfMonth As Date = Date(ThisYear, ThisMonth, 1)
  Dim StartDay As Integer = WeekDay(Date(FirstOfMonth)) 'the weekday of the first of the month
  Dim TextHeight, TextWidth, GridTop As Float

  GridTop = 7.2 * 960

  'Big Photo
  Paint.DrawPicture(Pic, LeftMargin, TopMargin / 2, Paint.Width - 2 * LeftMargin, 5 * 960) '5 inch height

  'Month and Year title
  Paint.Font = Font["Copperplate33bc,32"]
  TextHeight = Paint.TextExtents("S").Height 'the height of a character
  s = Choose(ThisMonth, "January", "February", "March", "April", "May", "June", "July", "August", "September", "October", "November", "December") & " " & ThisYear
  Paint.DrawText(s, 0, GridTop - 1000, Paint.Width, TextHeight, Align.Center) 'inch above grid top

  'Grid
  Dim Side As Float = (Paint.Width - 2 * LeftMargin) / 7 'one-seventh of the width between margins
  For row = 0 To 4
    For col = 0 To 6
      Paint.DrawRect(LeftMargin + Side * Col, GridTop + Side * Row, Side, Side, Color.Black) 'each square
    Next
  Next

  'Days of the Week headings
  Paint.Font = Font["Apple Chancery,12"]
  TextHeight = Paint.TextExtents("S").Height 'the height of a character
  For col = 0 To 7
    s = Choose(col + 1, "Sunday", "Monday", "Tuesday", "Wednesday", "Thursday", "Friday", "Saturday")
    Paint.DrawText(s, LeftMargin + Side * Col, GridTop - TextHeight - 96, Side, TextHeight, Align.Center)
  Next

  'Dates
  Dim DaysInMonth As Integer
  If ThisYear Mod 4 = 0 And ThisMonth = 2 Then DaysInMonth = 29 Else DaysInMonth = Choose(ThisMonth, 31, 28, 31, 30, 31, 30, 31, 31, 30, 31, 30, 31)
  Paint.Font = Font["Linux Libertine,20"]
  TextHeight = Paint.TextExtents("1").Height 'the height of a digit
  For row = 0 To 4
    For col = 0 To 6
      CellNum = 7 * row + col
      If CellNum >= StartDay Then
        DayNum += 1
        If DayNum > DaysInMonth Then Return 'Don't go to 35 days in the month!
        s = If(Col = 0, "<font color=#DD0000>" & DayNum & "</Font>", "<font color=#000000>" & DayNum & "</Font>")
        Paint.DrawRichText(s, LeftMargin + Side * Col + 96, GridTop + Side * Row + TextHeight + 96)
      Endif
    Next
  Next
  Row = 0
  Col = 0
  While DayNum < DaysInMonth 'Put extra dates up in the top left of the grid.
    DayNum += 1
    s = If(Col = 0, "<font color=#DD0000>" & DayNum & "</Font>", "<font color=#000000>" & DayNum & "</Font>")
    Paint.DrawRichText(s, LeftMargin + Side * Col + 96, GridTop + Side * Row + TextHeight + 96)
    Col += 1 'next column
  Wend

End


