Blender 3D:菜鸟到高手/低多边形头部建模
|
|
适用的 Blender 版本:2.75。 |
本教程旨在教用户在 Blender 中制作低多边形的动漫风格头部。
你需要了解的内容
- Blender 的基本控制
新手提示:在细分曲面上使用三角形可能会导致某些区域出现“尖峰”。为了减少这个问题,尽可能将三角形合并成四边形。
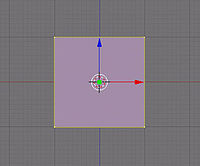
从一个新文件开始,并删除 ( X ) 默认的立方体。
处于正面视图 ( NUM1 )
添加一个平面 ( SHIFT + A -> 添加-> 网格-> 平面)
点击左下角设置中的“对齐到视图”。

切换到编辑模式
处于顶点选择模式
选择底部两个顶点 ( SHIFT + RMB ) 并按 W 键打开顶点菜单。选择“选择合并”,然后选择“在中心”,或者直接按 ALT + M 并选择“在中心”。

现在你有一个尖下巴了。

选择顶部两个顶点(使用 B )

通过按 G 移动和 Z 将移动限制在 Z 轴上,重新排列它们,使它们形成更像下巴的形状。
新手提示:将它向下移动;不要向外缩放。
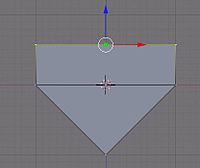
现在挤出 ( E ) “仅边”,沿着 Z 轴 ( Z ),这样你就有另一个区域了。

作为预防措施,移除重复顶点。(W 键)
缩放它 ( S ),使其不再那么立方。

现在再次沿着 Z 轴挤出 ( E 然后 Z ) 并缩放 ( S ) 它一点点。

最后一次... (E) (Z) (S)

选择中间的顶点 (B 键) 或 (RMB) 并按 (W 键) 打开特殊菜单。细分它一次。
注意:在较新的版本中,您需要选中左下角的复选框:“四边形/三角形模式”。

现在先选择中心线上方的一对顶点,并细分一次。

现在用中心线下方的一对顶点细分 2 次。

您的应该现在看起来像右边这个一样。
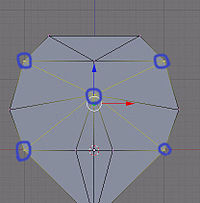
在这里选择并细分,这样你就可以制作眼睛了。

并重新排列顶点,使它们形成眼睛的形状。

现在选择这里中间的顶点(右键单击)。
沿着 Y 轴挤出它 (E 键) (Y 键) 并移动鼠标来改变它的移动距离。

选择这三个顶点 ('SHIFT+RMB) 并按 (F) 键制作面。

现在对另一边也做同样的事情,你将拥有鼻子的底部。

选择这些顶点 (SHIFT+RMB) 并制作面 (F)。
对另一边也做同样的事情。

现在你有一个鼻子了。

旋转相机 (CTRL+NUM1),使你看到背面。
处于面选择模式。
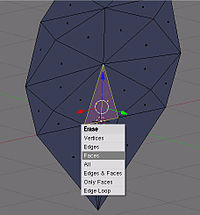
选择 (SHIFT+RMB) 鼻子后面的面。
删除 (X 键) 它们(在弹出窗口中选择“面”)。

处于顶点选择模式
选择下巴底部的顶点,以及鼻子底部的顶点。
细分它们。

处于边选择模式
选择所有外部的边(照片中用蓝色线显示)。

沿着 Y 轴 (Y 键) 向后移动 (G 键) 顶点,使面部更平滑。
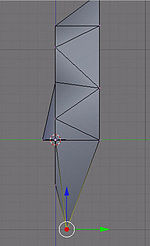
处于顶点选择模式
通过沿着 Y 轴 (Y 键) 移动 (G 键) 底部顶点来重新排列下巴,直到它看起来正确为止。

处于边选择模式
现在使用 (B 键) 选择头部后部周围的所有边。
沿着 Y 轴 (E 键) (Y 键) 挤出这些。

太棒了!
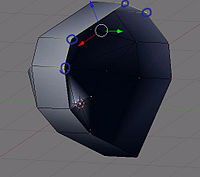
现在选择一组 4 个形成类似矩形的头部后部顶点,并按 (F 键) 制作面。

等等....

等等....

现在选择并细分这些一次 (W)

以及这些点。

现在选择中间并向后移动它 (G) (Y)。

这里就是使用细分曲面的效果。你完成了。按下 (F12) 键查看最终渲染结果。
